Custom fields allow for additional information to be collected from guests through the booking process and during/after their stay.
How to Edit/create custom fields
NOTE: Access to custom field settings are limited to Settings Managers only
Any previously created custom fields will be including the settings
NOTE: Editing a custom field is limited to once data has been added
Click on the create button to add a new custom field
Custom field settings explained:
- Active – Use the check box to activate or deactivate the custom field
- Label – This will be the name of the custom field shown to guests
- Description – Use this field to explain the purpose of the field
- Validation – The regex value allows users to ensure that data input matches the correct format. Eg. Using Email will cause an error if a user inputs data not with the email format. For more format options click here
- Value options – Users have three choices of the type of field that they would like to use
a. String – A string is a text box for user input. Eg. Car registration number
b. Checkbox – A checkbox is for users to confirm a question. Eg. Do you want extra towels?
c. Options – This allows users to select multiple options. Use a comma (,) to separate the options. Eg. Do you have any allergies?
Option 1. Lactose intolerance
Option 2. Shellfish
Option 3. Peanuts
- Entity type – Select where you want the field to be stored using the following options:
a. Person – The custom field will be stored under the guest profile, this should be used for information that should be used if the guest stays again eg. Gym Membership number
b. Company – The custom filed will be stored under the company profile and should be specific to the company.
c. Reservation – The custom field will be stored on the reservation only and should be used for information that may only be relevant for the current stay. Eg. Do you want extra towels
d. Property - The custom filed will be on a unit/accommodation in property management under more information
e. Property type - The custom field will be on a property type in property management under more information
f. Property Area - The custom field will be on an area in property management under more information
g. Property group -The custom field will be on the property category under more information
- Visibility - This defines if you want the field to be visible to guests or internal only
- Require & show on BE – By enabling this custom fields will be visible on the booking engine during the booking process and will a mandatory field
Click the Save button once you are done
Click on the edit button on the manage custom field page to open the editor.
Custom fields can be edited, however, once data has been added to the field only the following data can be changed:
-
- Active
- Label
- Description
- Visibility
- Require & show on BE

Where do the custom fields appear?
For Guest
Visibility will need to be selected as public and Require & show on BE enabled then the field will show on step 4 of the booking process on your booking engine

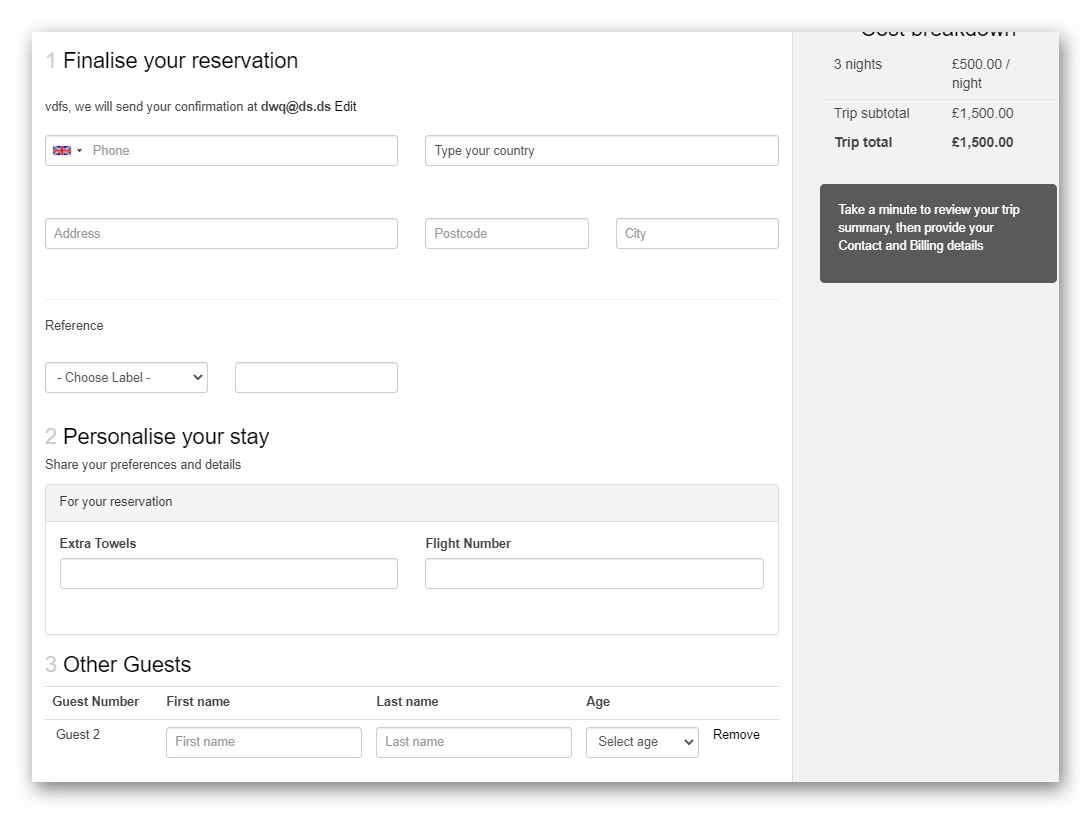
NOTE: Currently any custom fields that are visible on the booking engine will be a mandatory field
For (Staff)
Staff users will be able to see both public and internal custom fields but if you only want staff users to see and use the custom field then make the visibility can be selected as internal
Custom field data can be viewed and edited by Staff users on the Reservation or the guest/company profile depending on the entity set on the custom field click on the more details button to access the custom fields.
Example: Reservation edit

For the property entity types, the custom fields will appear in the property management section under the entity type
Example: Unit/accommodation